
Views: 241 Author: Eyunhome Vacuum Publish Time: 2026-09-13 Origin: Site


Content Menu
● Quick Answer: Why Does a Robot Vacuum Keep Stopping?
● Start With the Error Message and Stopping Pattern
● Check Battery Power and Charging Performance First
>> Clean the Charging Contacts
>> Check Whether the Dock Is Positioned Correctly
● Remove Hair, Debris, and Brush Blockages
>> Clean the Main Brush Thoroughly
>> Check the Suction Inlet and Air Path
● Empty the Dustbin and Maintain the Filter System
>> How to Maintain the Dustbin
>> Clean or Replace Filters Correctly
● Clean Robot Vacuum Sensors for Better Navigation
>> Important Sensors to Inspect
>> Test for Dark Floors and Reflective Surfaces
● Inspect Wheels, Bumper Movement, and Floor Resistance
>> Consider Rug Thickness and Door Thresholds
● Check Wi-Fi, Firmware, Mapping, and App Settings
>> Review No-Go Zones and Room Boundaries
>> Use Factory Reset Only as a Final Step
● When a Robot Vacuum Stopping Problem Requires Service
● A Practical Maintenance Schedule That Prevents Sudden Stops
● What Vacuum Brands and Buyers Should Learn From Common Stopping Complaints
● Final Thoughts: Fix the Cause, Not Just the Error
● FAQs About Robot Vacuums That Keep Stopping
>> 1. Why does my robot vacuum stop after a few minutes?
>> 2. Why does my robot vacuum keep stopping on carpet?
>> 3. Can dirty sensors make a robot vacuum stop?
>> 4. Why does my robot vacuum spin in circles and stop?
>> 5. Does a full dustbin cause a robot vacuum to stop?
>> 6. Should I reset my robot vacuum if it keeps stopping?
>> 7. Why does my robot vacuum return to the dock before finishing?
>> 8. How often should I clean my robot vacuum to prevent it from stopping?
A robot vacuum that keeps stopping can turn an automated cleaning routine into a daily frustration. One moment it is moving normally across the floor; the next, it pauses, spins in place, reports an error, loses its route, or returns to the charging dock before the job is finished.
In most cases, the cause is not a serious failure. Low battery power, blocked brushes, dirty sensors, wheel resistance, full dustbins, restricted airflow, software errors, and difficult floor conditions are among the most common reasons a robot vacuum stops unexpectedly. The key is to diagnose the issue in the right order instead of replacing parts too early.
From a manufacturing and product-support perspective, I recommend starting with the simplest checks: power, debris, moving parts, sensors, and environmental obstacles. Then move to firmware, mapping, batteries, and internal components only if basic maintenance does not solve the problem.
This guide explains why your robot vacuum keeps stopping, how to fix it safely, and how brands, distributors, and product buyers can reduce these complaints through better product specification, maintenance guidance, and after-sales planning.
A robot vacuum may keep stopping because its battery is low, its brushes or wheels are jammed, its dustbin or filter is clogged, or its sensors cannot read the environment correctly.
Other possible causes include:
- Dirty cliff sensors or navigation sensors
- Hair tangled around the main brush or wheel axles
- A full dustbin or blocked suction inlet
- A dirty, damp, or worn filter
- Thick rugs, high thresholds, or uneven flooring
- Poor charging contact between the robot and dock
- Weak Wi-Fi connection or outdated firmware
- A deteriorating battery
- Internal motor, wheel, sensor, or motherboard faults
Before assuming the robot vacuum is defective, perform a structured inspection. Most intermittent stopping problems are caused by debris, blocked airflow, or unsuitable cleaning conditions.
The way a robot vacuum stops provides important clues. Do not only look at the final error notification. Observe what happens immediately before the robot stops.
For example, a robot that stops after ten minutes may have a battery or airflow problem. A robot that always stops near the same rug may be struggling with surface resistance. A robot that turns in circles may have a wheel, bumper, or navigation issue.
Use the table below to narrow down the cause quickly.
| What You Notice | Most Likely Cause | First Action to Take |
|---|---|---|
| Robot stops shortly after starting | Low battery, poor charging, dirty charging contacts | Charge fully and clean charging contacts |
| Robot stops on carpet or thresholds | Wheel resistance, low climbing ability, brush overload | Test on hard flooring and inspect wheels |
| Robot turns in circles | One wheel blocked, side brush tangled, sensor issue | Clean wheel modules and side brushes |
| Robot stops with weak suction | Full dustbin, blocked filter, clogged air channel | Empty bin and clean the filter system |
| Robot repeatedly hits furniture | Dirty bumper, sensor obstruction, mapping issue | Wipe sensors and test bumper movement |
| Robot reports cliff or drop error on flat flooring | Dirty cliff sensors or dark reflective flooring | Clean underside sensors and test another room |
| Robot returns to dock too early | Battery aging, charging issue, map or firmware issue | Check battery runtime and update firmware |
| Robot stops in one specific location | Rug, cables, threshold, sunlight, reflective surface | Remove obstacle and test the area again |
| Robot stops after an update | App, firmware, Wi-Fi, or mapping conflict | Restart robot, app, and router; update again if needed |
A repeatable stopping pattern is more useful than a single error code. Encourage users to record where, when, and under what floor condition the problem occurs.
Battery performance is one of the first areas to inspect when a robot vacuum keeps stopping. Even if the robot displays a high charge level, it may not be receiving or holding power correctly.
Charging contacts can collect dust, oxidation, pet hair, and cleaning residue. When the contacts are dirty, the robot may appear to dock correctly but charge incompletely.
Follow these steps:
1. Turn off the robot vacuum.
2. Unplug the charging dock from the power outlet.
3. Locate the metal charging contacts on the robot and dock.
4. Wipe both sides with a clean, dry microfiber cloth.
5. If residue remains, use a small amount of isopropyl alcohol on the cloth.
6. Allow all surfaces to dry completely.
7. Reconnect the dock and place the robot firmly on the charging base.
Do not spray liquid directly onto the charging dock or robot. Moisture around electrical contacts can lead to corrosion or charging instability.
A charging dock should be placed on a flat, stable, open area. If the dock is located behind furniture, on a thick rug, near steps, or in a crowded corner, the robot may struggle to align itself.
Keep the area in front of the dock clear. Avoid placing the station under direct sunlight if the robot uses infrared guidance, because strong sunlight can interfere with certain docking sensors.
Rechargeable batteries gradually lose capacity after repeated charging cycles. A robot vacuum that previously cleaned for 90 minutes but now stops after 20 to 30 minutes may have a worn battery rather than a navigation problem.
Common signs of battery aging include:
- Shorter cleaning time after a full charge
- Robot shutting down without warning
- Robot returning to the dock too often
- Battery percentage dropping unusually fast
- Charging taking much longer than before
- Robot not powering on after being stored for a long period
For product brands and distributors, battery replacement availability is essential. A well-designed after-sales program should provide clear battery specifications, replacement instructions, safety information, and compatible spare-part channels.
Hair, threads, packaging straps, small toys, and pet fur are among the most common reasons a robot vacuum stops moving or loses suction. These materials can wrap around the main brush, side brush, wheel axle, and suction inlet.
The main brush handles the highest amount of debris during each cleaning cycle. Long hair can become tightly wrapped around both ends of the brush, placing extra strain on the motor.
To clean the main brush:
1. Turn off the robot vacuum.
2. Remove the brush cover according to the product manual.
3. Take out the roller brush.
4. Cut away hair carefully with the included cleaning tool or a safe cutting tool.
5. Remove dust from both brush ends and bearing areas.
6. Check the brush chamber for trapped debris.
7. Reinstall the brush securely.
If the brush is worn, cracked, deformed, or missing bristles, replace it. A damaged brush can reduce pickup performance and create uneven resistance during operation.
Side brushes are designed to sweep dust from wall edges and corners into the suction path. They can become bent, tangled, or overloaded with hair.
Replace side brushes if they:
- Remain bent after cleaning
- Rotate slowly or irregularly
- Are missing bristles
- Frequently hit the floor or housing
- Become loose on the mounting point
A side brush that is too stiff, too long, or poorly balanced can create noise and increase power consumption. For OEM/ODM vacuum development, side-brush flexibility, mounting strength, and rotational stability should be evaluated during durability testing.
A robot vacuum may continue moving while collecting very little dust if the airflow path is blocked. In more severe cases, restricted airflow can raise motor load and trigger protective shutdown behavior.
Inspect:
- Dustbin inlet
- Suction channel
- Filter frame
- Main brush chamber
- Air outlet
- Auto-empty station port, if equipped
Remove visible debris without forcing sharp objects into narrow air channels. If an obstruction cannot be reached safely, consult the product service instructions.
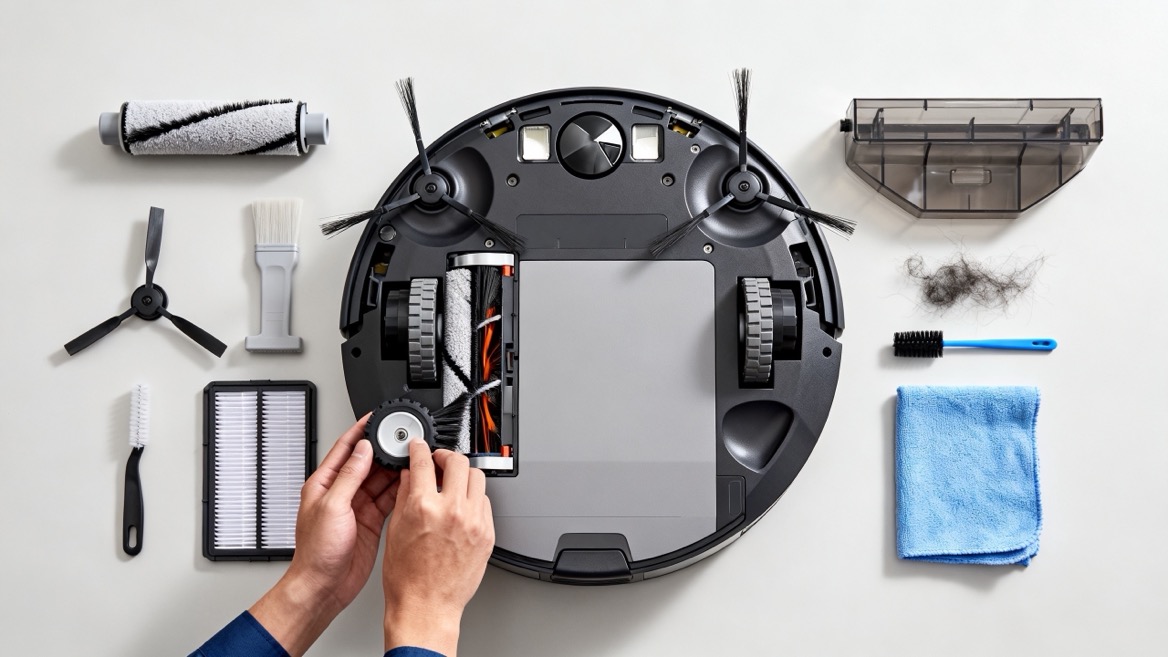
A full dustbin can make a robot vacuum less efficient. Fine dust can also accumulate on the filter surface, limiting airflow before the dustbin looks completely full.
A clean filter supports stable suction, lower motor strain, and more consistent runtime.
Empty the dustbin after each cleaning cycle in homes with pets, carpets, high dust levels, or long hair. In lower-dust environments, inspect it before each scheduled cleaning session.
Make sure the dustbin is reinstalled correctly. An improperly seated dustbin can cause air leaks, error messages, or poor suction.
Not every filter should be washed. Some filters are washable, while others should only be tapped or brushed clean. Always follow the product-specific instructions.
If a filter is washable:
1. Rinse it with clean water only if the manual permits it.
2. Shake off excess water.
3. Leave it to dry naturally in a ventilated area.
4. Wait until it is fully dry before reinstalling it.
Never reinstall a damp filter. Moisture can trap dust, reduce airflow, create odors, and potentially damage internal components.
For replacement planning, brands should offer filter kits as standard maintenance accessories. Distributors can also increase customer satisfaction by clearly explaining recommended replacement intervals based on floor type, household size, and pet ownership.
Modern robot vacuums rely on multiple sensors to avoid obstacles, detect stairs, find the charging dock, map rooms, and maintain a safe route.
When sensors become covered with dust, fingerprints, pet hair, or cleaning residue, the robot may stop unnecessarily or behave unpredictably.
Depending on the model, a robot vacuum may include:
- Cliff sensors on the underside
- Infrared wall sensors
- Obstacle-detection sensors
- Laser navigation modules
- Camera-based navigation components
- Bumper sensors
- Docking sensors
- Wheel-drop or wheel-lift sensors
Use a soft, dry microfiber cloth to clean sensor windows. Do not use abrasive materials, excessive water, or strong chemical cleaners.
Some robot vacuums may mistake very dark carpets, glossy black tiles, mirrored surfaces, or reflective metal strips for a drop or cliff. This can cause the robot to stop, reverse, or refuse to enter a certain area.
To confirm this issue:
1. Move the robot to a lighter-colored hard floor.
2. Start a manual cleaning cycle.
3. Observe whether it operates normally.
4. Return it to the problem area.
5. Compare the behavior.
If the robot only stops on a black rug or highly reflective floor, the issue may be environmental rather than mechanical.
For product development, adjustable cliff-sensor sensitivity and adaptive floor recognition can improve usability in global markets where dark flooring and mixed surface materials are common.
A robot vacuum needs free-moving wheels and a responsive bumper to travel safely. A small amount of hair around a wheel axle can create enough resistance to stop the robot or make it travel in circles.
Turn off the robot and place it upside down on a clean, soft surface. Press each drive wheel gently.
A healthy wheel should move smoothly with spring resistance and return to its original position. If one wheel feels stuck, loose, noisy, or difficult to rotate, inspect it for wrapped hair and trapped debris.
Do not pull forcefully on wheel assemblies. Internal wheel modules may include wires, gears, springs, and sensors.
The front bumper should move freely when pressed and return to its normal position. Dust or debris around the bumper edge can cause false collision detection.
If the robot repeatedly stops in front of open space or constantly reverses after light contact, clean the bumper gap with a soft brush or compressed air designed for electronics maintenance.
Not every robot vacuum is designed to cross every transition. Thick carpet, high door thresholds, loose rug edges, and uneven tiles can stop the wheels or overload the brush system.
Before blaming the machine, check:
- Carpet pile height
- Rug tassels and curled edges
- Threshold height
- Floor gaps between rooms
- Loose cables
- Pet bowls, toys, and furniture legs
- Uneven stone, tile, or wood flooring
A practical way to test this is to run the robot in one open room with hard flooring. If it completes the cycle there, gradually introduce rugs and thresholds to identify the challenging surface.
A robot vacuum can stop because of a physical issue, but connected models may also experience interruptions related to the app, Wi-Fi connection, maps, schedules, or software.
If the robot begins stopping after a network change, app update, power outage, or firmware update, perform a basic restart first.
1. Turn off the robot.
2. Wait for approximately one minute.
3. Restart the robot.
4. Restart the mobile app.
5. Restart the Wi-Fi router if connection problems are present.
6. Confirm that the robot is connected to the recommended network band for the specific model.
7. Check for available firmware updates.
A restart can clear temporary communication errors without removing saved maps or schedules.
Incorrect virtual boundaries may cause a robot to stop, turn away, or repeatedly fail to enter a room. This often happens after furniture is moved, a map is edited, or a new floor plan is created.
Review the map for:
- No-go zones covering part of the room
- Incorrect room divisions
- Restricted carpet zones
- Outdated furniture placement
- Dock location changes
- Duplicate maps for the same floor
If necessary, delete the affected map and create a new one in a tidy, well-lit environment. Keep doors open and remove loose wires during the first mapping cycle.
A factory reset may solve persistent software-related errors, but it can erase maps, schedules, custom cleaning preferences, and Wi-Fi settings.
Use a factory reset only when:
- The robot repeatedly shows the same unexplained error
- The robot cannot reconnect after standard troubleshooting
- Firmware behavior remains unstable after restarting
- Support instructions specifically recommend it
- Mechanical, battery, airflow, and sensor checks have already been completed
Always consult the exact model manual because reset procedures differ by product.
Some issues should not be handled through home cleaning or basic troubleshooting. Stop using the robot and contact professional support if you notice a burning smell, smoke, excessive heat, swollen battery housing, repeated electrical shutdowns, or loud grinding noises.
You should also seek service when:
- The robot will not charge after contact cleaning
- One wheel does not move after debris removal
- The fan motor makes an unusually loud noise
- The robot displays a persistent sensor error
- Water has entered the robot
- The battery compartment appears damaged
- The robot stops even in an empty, clean room after a reset
Do not disassemble the battery pack or internal electronic boards. Lithium-ion batteries and electronic control systems require proper safety procedures and compatible replacement components.
Regular maintenance is the most effective way to prevent repeated stopping problems. The exact schedule depends on the floor area, pet hair, carpet coverage, and cleaning frequency, but the following routine works well for many households.
| Maintenance Task | Suggested Frequency | Why It Matters |
|---|---|---|
| Empty dustbin | After every use or as needed | Maintains airflow and pickup performance |
| Remove hair from main brush | Weekly; more often with pets | Prevents brush overload and motor strain |
| Clean side brushes | Weekly | Supports edge cleaning and smooth rotation |
| Wipe sensors | Weekly or every two weeks | Helps navigation and drop detection |
| Clean charging contacts | Every two to four weeks | Supports stable charging |
| Inspect wheels | Every two weeks | Prevents hair buildup and travel problems |
| Clean filter | According to filter type and manual | Protects airflow and suction consistency |
| Replace worn consumables | As needed | Maintains cleaning quality and reduces strain |
| Update firmware | When available | Improves compatibility and system stability |
A clear maintenance schedule should be included in the quick-start guide, product page, app reminders, and after-sales message sequence. This approach reduces unnecessary returns and helps users enjoy more consistent cleaning performance.
For retailers, importers, private-label brands, and procurement teams, repeated customer complaints about a robot vacuum stopping are not only support issues. They often reveal product-design, documentation, accessory, and quality-control opportunities.
A reliable robot vacuum should be evaluated beyond suction power. Buyers should also assess:
- Battery capacity and real-world runtime
- Wheel torque and threshold-climbing ability
- Brush-roll anti-tangle performance
- Dustbin capacity and airflow design
- Sensor layout and cleaning accessibility
- Filter availability and replacement cost
- Docking consistency
- Noise performance
- Mobile-app stability
- Spare-part supply and after-sales support
- Packaging protection for international shipping
- Product documentation for first-time users
For example, a robot vacuum may perform well in a controlled test room but generate complaints in real homes if it cannot handle pet hair, dark rugs, high thresholds, mixed flooring, or crowded furniture layouts.
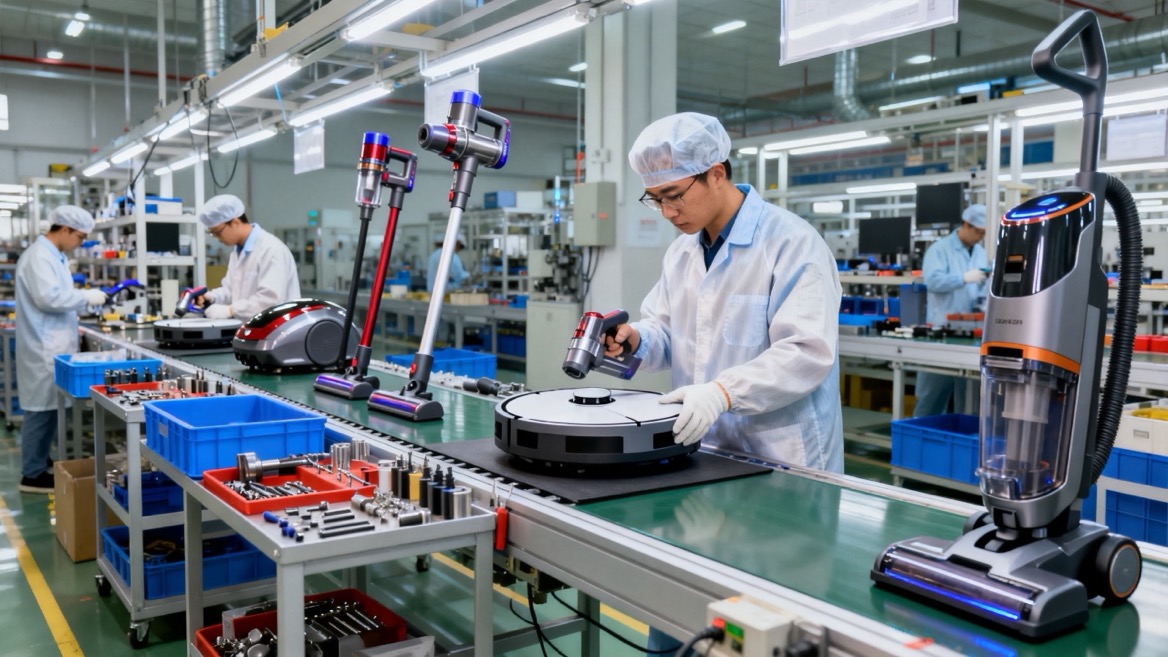
That is why product customization should include real-use testing. At Ningbo Eyunhome Electric Technology Co., Ltd., we understand that different sales channels and markets need different cleaning solutions. A compact cordless vacuum may suit apartment buyers, while a corded upright vacuum may better serve high-traffic households, commercial users, or carpet-focused markets.
For businesses sourcing vacuum cleaners, OEM and ODM planning can include motor options, battery configurations, brush-head designs, filtration systems, color customization, private-label packaging, accessories, instruction manuals, and after-sales spare-part strategies.
When a robot vacuum keeps stopping, start with the basics: charge, dustbin, filter, brush, wheel, sensor, and floor conditions. These checks solve many common problems without costly repairs.
If the robot still stops after cleaning and testing it in an open room, move to software, mapping, battery performance, and professional service. Avoid repeated resets or part replacements before you identify the actual cause.
For brands and buyers, the best long-term solution is to combine dependable product design with clear maintenance guidance, accessible replacement parts, and responsive support. A vacuum cleaner is not judged only by its suction power. It is judged by whether it continues working reliably in real homes.
Ready to develop a dependable vacuum cleaner range for your market? Contact Ningbo Eyunhome Electric Technology Co., Ltd. to discuss upright, handheld, corded, cordless, and customized vacuum cleaner solutions, including OEM/ODM development, stable manufacturing, private-label support, and global after-sales planning.
A robot vacuum that stops after a few minutes may have a weak battery, dirty charging contacts, a blocked brush roll, a clogged filter, or overheating caused by restricted airflow. Start by charging the robot fully, emptying the dustbin, cleaning the filter, and removing hair from the brush and wheels.
Thick carpet, curled rug edges, tassels, and high-pile fibers can increase wheel resistance and interfere with brush rotation. Test the robot on hard flooring. If it works normally there, the carpet may exceed the model's recommended operating conditions.
Yes. Dirty cliff sensors, obstacle sensors, docking sensors, or navigation components can cause false errors. The robot may think it is near stairs, blocked by an obstacle, or unable to locate its path. Wipe sensor windows gently with a soft, dry cloth.
This often indicates that one drive wheel is blocked or not rotating correctly. Hair, threads, or debris may be wrapped around the wheel axle. It can also be caused by a side brush obstruction, bumper problem, or sensor fault.
A full dustbin can reduce airflow and suction. If the filter and air channel are also blocked, the robot may work harder, lose cleaning efficiency, or activate protection features. Empty the dustbin regularly and maintain the filter according to the manual.
Try cleaning, charging, restarting, and checking the map first. A factory reset should be used only after basic troubleshooting fails because it may erase saved maps, schedules, Wi-Fi settings, and personalized cleaning preferences.
The robot may have a low battery, reduced battery capacity, poor charging performance, an inaccurate map, or an area that requires more power to cross. Clean the charging contacts, confirm full charging, test the robot in a simple room, and review its map settings.
Empty the dustbin after use when needed, remove hair from brushes weekly, wipe sensors regularly, inspect wheels every two weeks, and clean charging contacts every two to four weeks. Homes with pets, carpets, or long hair may require more frequent maintenance.
1. [Eureka: Why Does My Robot Vacuum Keep Stopping?]
2. [ECOVACS: Why Your Robot Vacuum Keeps Stopping and How to Fix It]
3. [ECOVACS: Vacuum Cleaner Stopped Working—Common Problems and Fixes]


